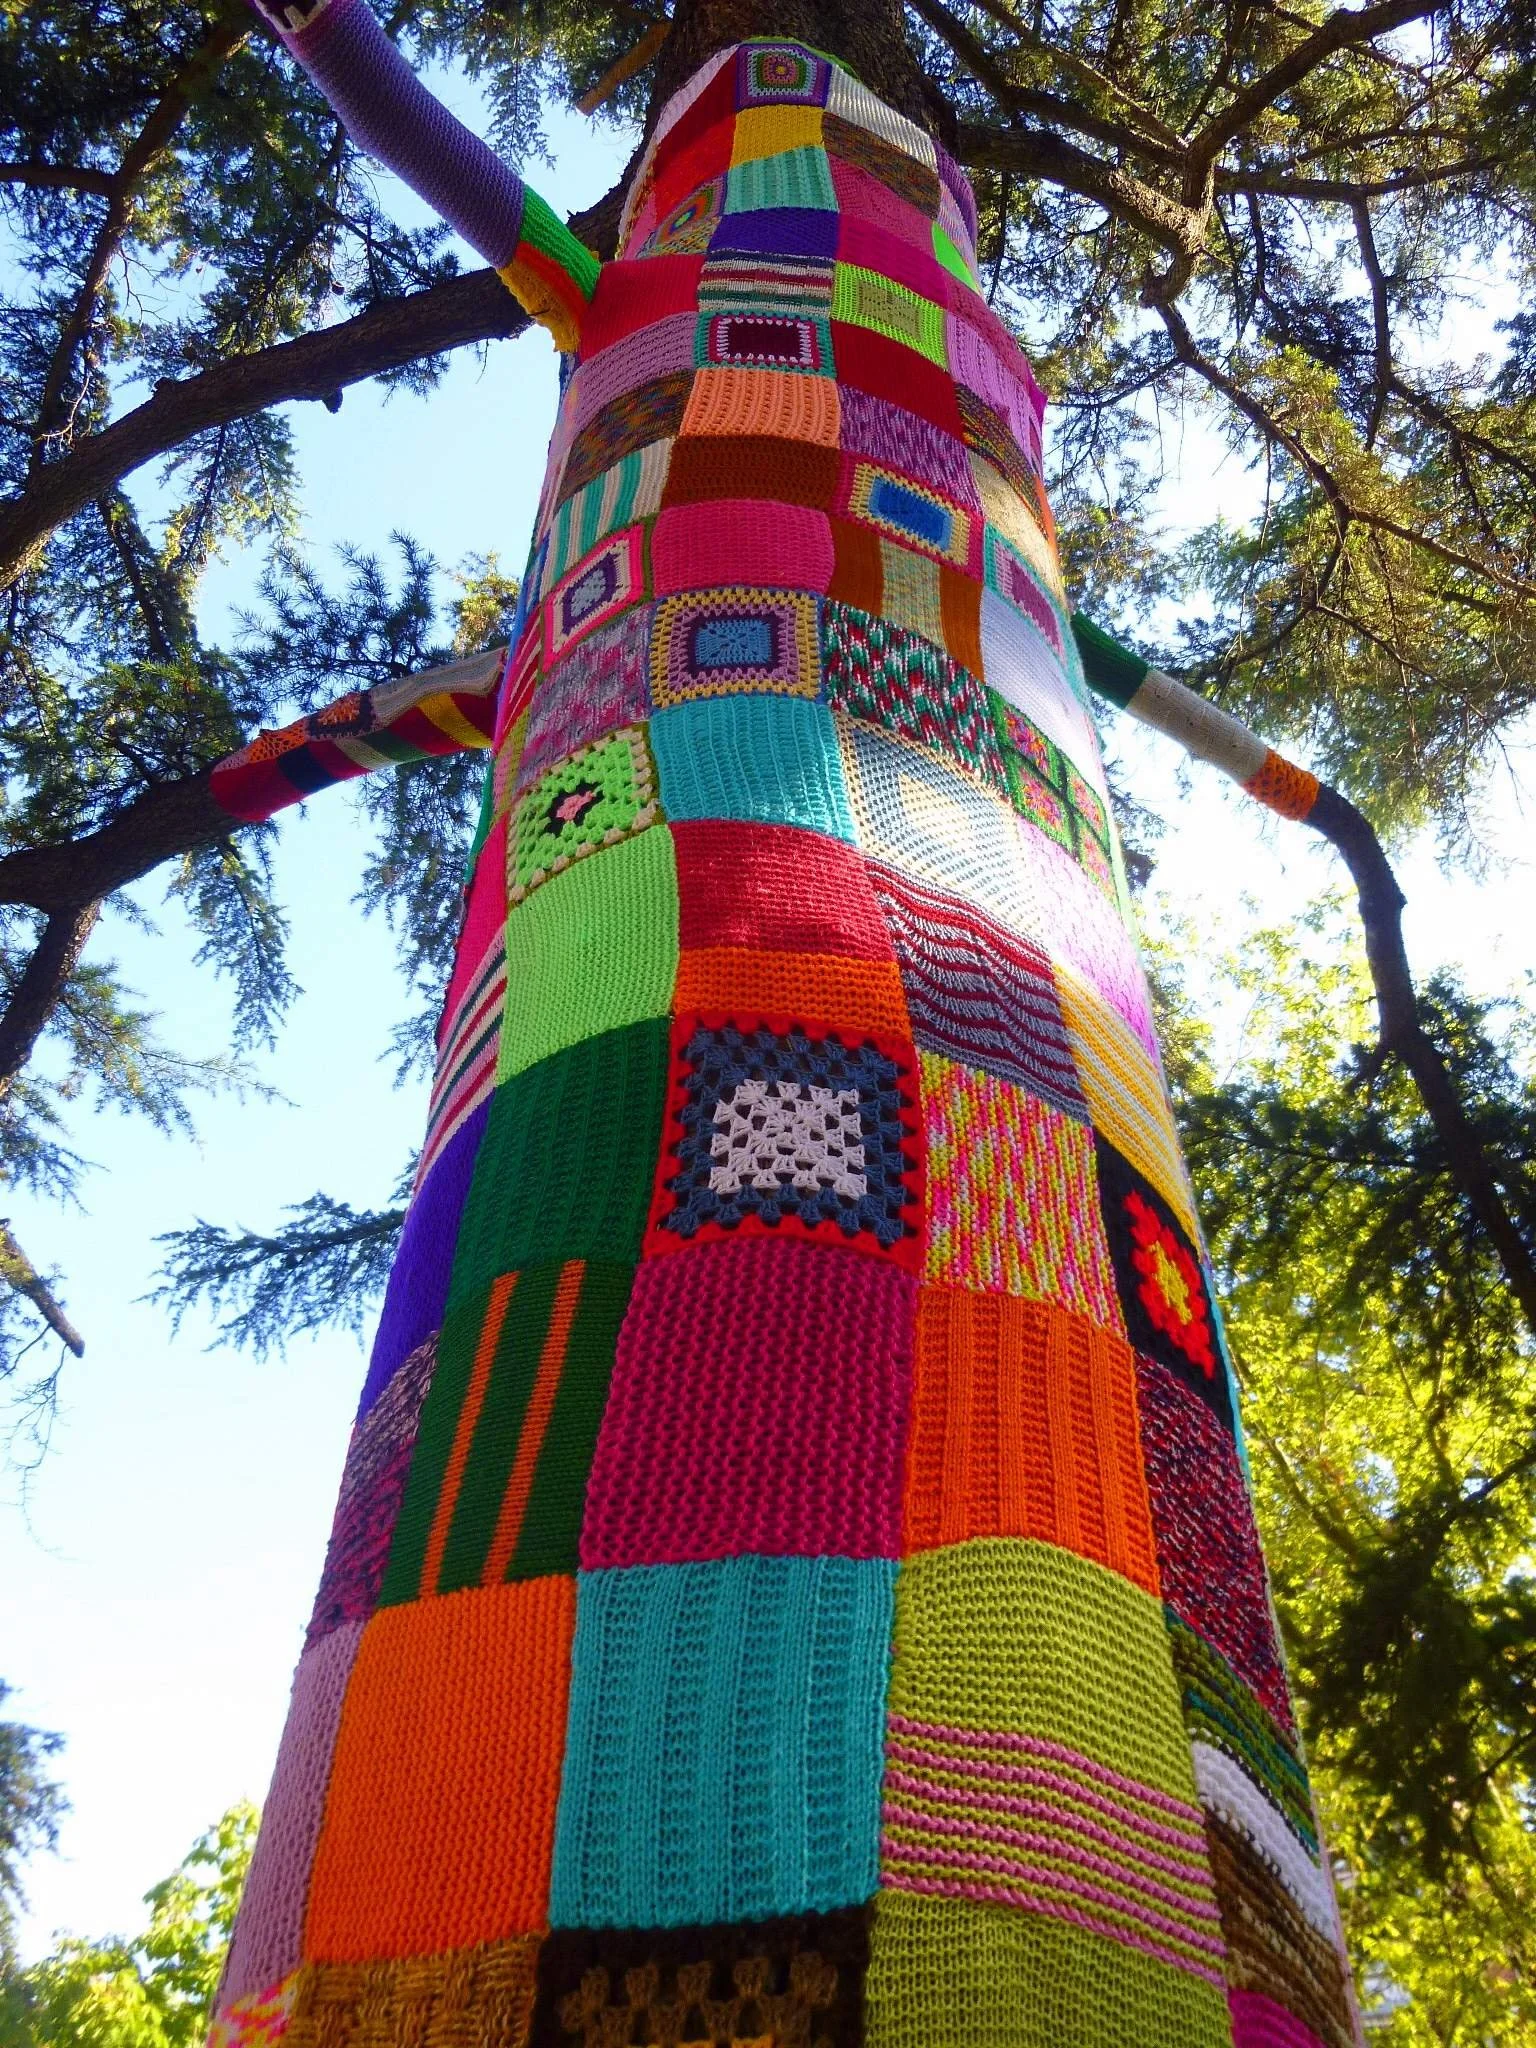
Have you ever walked past a tree wrapped in colorful crochet squares or a park bench covered in knitted artwork and wondered how it all came together?
Community yarn bombs are one of the most accessible and engaging public art projects you can organize. They bring together people of all ages and skill levels, brighten public spaces, and create a sense of community pride that lasts long after the installation is complete.
Whether you're part of a library, arts organization, school, community center, downtown association, or simply a group of enthusiastic fiber artists, this guide will show you how to organize a successful community yarn bomb project from start to finish.
What Is a Community Yarn Bomb?
A yarn bomb is a temporary public art installation created using knitted, crocheted, woven, or stitched pieces. These textile creations are attached to trees, benches, railings, fences, sculptures, and other public spaces to create a colorful and unexpected artistic experience.
Unlike many public art projects, yarn bombing is incredibly approachable. Participants don't need advanced artistic skills to contribute. A single crochet square or knitted panel can become part of a much larger collaborative artwork.
Why Organize a Community Yarn Bomb?
Community yarn bomb projects offer benefits that go far beyond the finished artwork.
They can:
- Bring people together around a shared creative goal
- Encourage participation from all ages
- Create opportunities for social connection
- Beautify public spaces
- Generate local media attention
- Increase community engagement
- Celebrate creativity and craftsmanship
- Provide a welcoming entry point into public art
Many communities discover that a yarn bomb becomes more than an art project—it becomes a memorable community event.
Step 1: Choose Your Location
The first step is selecting a location that is visible, accessible, and appropriate for installation.
Popular locations include:
- Public parks
- Community centers
- Libraries
- Downtown business districts
- School campuses
- Walking trails
- Art centers
Before moving forward, be sure to obtain permission from property owners or local officials if needed.
Step 2: Select a Theme
A theme helps create a cohesive final installation while still allowing participants to express their creativity.
Some popular themes include:
- Community pride
- Local history
- Nature and gardens
- Americana
- Seasonal celebrations
- Cultural heritage
- Color-based themes
Keep the theme broad enough that participants can interpret it in their own unique ways.
Step 3: Decide What Participants Will Make
The easiest way to encourage participation is to keep contributions simple.
Common project pieces include:
- Crochet squares
- Knitted squares
- Granny squares
- Flowers
- Leaves
- Geometric motifs
Many organizers request 4-inch or 6-inch squares because they are beginner-friendly and easy to assemble into larger installations.
Providing a simple pattern can also help participants feel confident about contributing.
Step 4: Recruit Participants
Now it's time to spread the word.
Successful recruitment often includes:
- Social media promotion
- Community newsletters
- Library bulletin boards
- Local yarn shops
- Senior centers
- Schools
- Community organizations
- Word-of-mouth
Consider hosting free stitch-and-social gatherings where participants can work on their pieces together. These events often become one of the most meaningful parts of the project.
Step 5: Collect and Organize Contributions
As contributions begin arriving, create a system for keeping everything organized.
Track:
- Participant names
- Number of pieces submitted
- Sizes and dimensions
- Collection dates
Storage bins, labeled bags, and simple spreadsheets can make the process much easier as your project grows.
Step 6: Plan the Installation
Installation day will go much more smoothly if you prepare in advance.
Before installation:
- Measure installation areas
- Estimate how many pieces you'll need
- Recruit volunteers
- Assign installation teams
- Gather supplies such as zip ties, yarn, scissors, and ladders
Creating a simple site map can help volunteers understand where pieces should be placed and reduce confusion on installation day.
Step 7: Document the Process
Don't wait until the installation is complete to start taking photos.
Document:
- Planning meetings
- Workshops
- Participants creating pieces
- Collection milestones
- Installation day
- The finished project
These photos are invaluable for social media, future promotions, grant applications, annual reports, and community storytelling.
Step 8: Celebrate the Finished Installation
Once the project is complete, take time to celebrate.
Invite:
- Participants
- Families
- Community members
- Local media
- Sponsors
- Community leaders
A simple unveiling event can help participants feel recognized and appreciated while generating excitement for future projects.
Common Challenges and How to Solve Them
Not Enough Contributions
Start promotion earlier than you think necessary and provide beginner-friendly patterns.
Volunteer Shortages
Partner with schools, service organizations, fiber arts groups, and community clubs.
Weather Concerns
Plan for a temporary installation and choose materials that can withstand outdoor conditions for the duration of the project.
Organizational Challenges
Create clear timelines, collection deadlines, and volunteer responsibilities before the project begins.
Final Thoughts
Community yarn bomb projects are a wonderful way to bring people together through creativity. They transform ordinary spaces into colorful works of art while creating meaningful connections between participants.
With thoughtful planning, clear communication, and a welcoming approach, your project can become a memorable community event that inspires creativity and pride for years to come.
Ready to Organize Your Own Community Yarn Bomb?
If you're excited about launching a community yarn bomb but don't want to start from scratch, I've created a detailed guide based on real-world experience organizing community fiber art projects.
The Community Yarn Bomb Guide includes:
✓ Planning timelines
✓ Volunteer coordination tools
✓ Participant recruitment strategies
✓ Promotion and marketing ideas
✓ Installation planning worksheets
✓ Practical tips and lessons learned
Instead of creating your own systems and documents from scratch, you'll have ready-to-use resources that can help you plan a successful project with confidence.
Click here to get the Community Yarn Bomb Guide and start planning your project today.